Complete guide how to setup GA4 on Shopify
Step 8. How to implement GA4 view_tem_list event in Shopify
To be able to analyze in Google Analytics 4(GA4) traffic on your products pages and report for example which items are most popular you have to implement GA4 view_item_list event. Below, you will find instructions on how to do it using Google Tag Manager and data layer variables in Shopify.
- Implement data layer variables in Shopify.
In this step we implement products data layer variables into Shopify template. These variables we use later in GTM to sent them to Google Analytics every time when user visit Shopify product page.
Let's go to your Shopify Admin to edit your theme.liquid template. (Online Store>Themes>Edit your template code>theme.liquid).
Inside your section, before the part about GTM, paste the following data layer code:
{% if template contains 'collection' %}
window.dataLayer = window.dataLayer || [];
window.dataLayer.push({
'event': 'view_item_list',
'item_list_id': '{{ collection.id}}',
'item_list_name': '{{ collection.title}}',
'items': [
{% for product in collection.products %}
{
'item_id': '{{product.id}}',
'item_name': '{{product.title}}',
'item_category': '{{product.type}}',
'price': '{{ product.price | times: 0.01 }}'
},
{% endfor %}
]
});
{% endif %} - Define new variables in Google Tag Manager using data layer.
Go to "Variables" and in "User-Defined Variables" section click "New" button. Than:
a) Create "DL – item_list_id" data layer variable as follow (chose variable type as "Data Layer Variable")
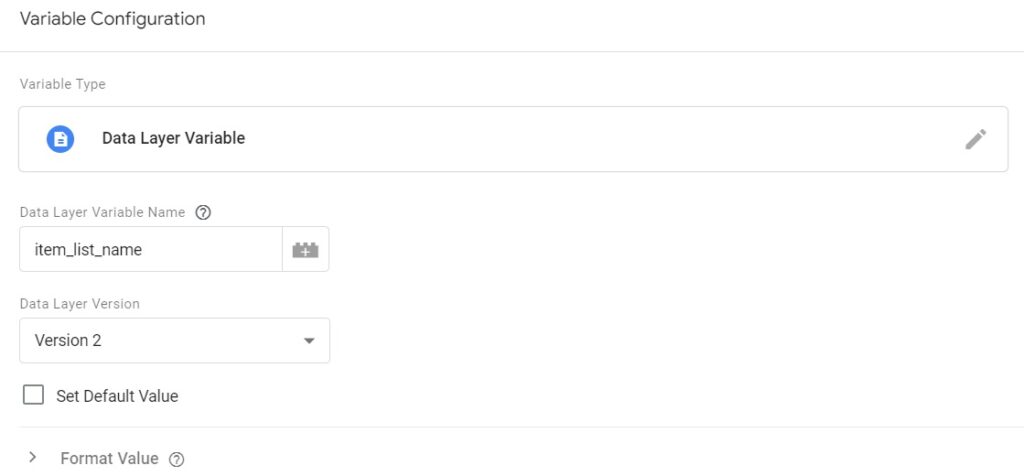
b) Create "DL – item_list_name" data layer variable as follow (chose variable type as "Data Layer Variable")
c) If you don't already have "DL – items"created, create it in the same way as Variables above (chose variable type as "Data Layer Variable"). - Create trigger that we use to fire new view_item tag.
Go to trigger section and create new trigger:
then:
a) Create new "CE view_item_list" trigger as follow:
- Create GA4 – view_item_list tag in Google Tag Manger.
Go to "Tags" and click "New" button to add new tag.
and name like "GA4 – view_item_list", then choose tag type and select "Google Analytics: GA4 Event", and your configuration tag that you have already created here: How to implement GA4 Configuration tag in Google Tag Manager? and set "Event Name" to "view_item_list",
then setup "Event Parameters" as follow:
then choose your trigger that you have already created a while before (CE view_item_list),
and click "Save" button on the top right corner, and click "Submit" to published.
Lets go to the next step of our tutorial which is:How to implement GA4 select_item event in Shopify
Anna Bacciarelli
During twelve years of professional work, I have gained experience in various positions in many fields. The variety of classes and professional experience taught me openness, independence, creativity, a positive approach to people and teamwork.Currently, I would like to focus on a new, extremely interesting path that is IT, and more specifically internet analytics. From the beginning of 2022, I have been gaining experience using the following tools: Google Analytics, Google Tag Manager and Google Data Studio.
If you enjoyed the article please share it:
This guide is all about how to implement Google Analytics(GA4) on Shopify. To setup GA4 on Shopify website we use Google Tag Manger(GTM) and Shopify data layer.
 Oct 12, 2022
If you want to measure traffic on your Shopify website, the first thing is to create Google Analytics account for your website
 Published by Piotr Ulacha
 Oct 13, 2022
If you have Google Account but you don't have GA4 property yet, because for example you are still using Universal Analytics property (former version of GA4) you have to create new GA4 property.
 Published by Piotr Ulacha
 Oct 14, 2022
Because we will use Google Tag Manger as a method to implement Google Analytics 4 you have to create GTM account.
 Published by Piotr Ulacha
 Oct 15, 2022
If you want to get the best out of Google Analytics 4 apply the following recommended GA4 settings and best practices.
 Published by Piotr Ulacha
 Oct 16, 2022


